Cooking Methods can be a beast when you are trying to teach 20-25 students.
I struggle with limited supplies and those groceries can get expensive.
So, I always teach cooking methods after I teach Poultry and Fabrication so that I can use the products created from those lab to facilitate the labs after.
Unit Plan
Prior to teaching Cooking Methods, make sure to cover and assess poultry and fabrication.
Day 1:
Lecture (Food Composition, 3 types of Cooking Methods, 3 types of heat transfer, dry cooking methods) w/ notetaker.
* This is a mixture of my information and information from another PowerPoint that I found on the web.
*I have been unable to locate the other PowerPoint.
*But thank you so much, to the person that posted it 5 years ago. It has been such an awesome addition to my curriculum :)
Cooking Methods PowerPoint
Activity(give each of your students a cooking method and have them create a poster that explains the cooking method take these up and make copies for the entire class front and back)


Day 2:
Quiz Vocabulary
Quizlet Review: https://quizlet.com/_1z2umz (copy and paste)
Lecture:
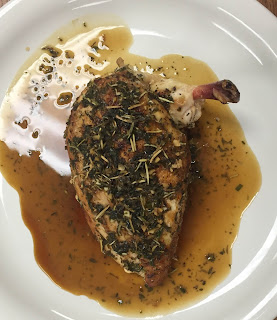
Lab: (Pan Seared Air Line Breast with a pan sauce) ALL OF YOUR STUDENTS NEED TO DO THIS http://www.foodnetwork.com/recipes/robert-irvine/pan-seared-chicken-breast-with-herb-jus-and-potato-vegetable-hash-recipe.html (don't make the hash)
Day 3: (1-3 days)


I struggle with limited supplies and those groceries can get expensive.
So, I always teach cooking methods after I teach Poultry and Fabrication so that I can use the products created from those lab to facilitate the labs after.
Unit Plan
Prior to teaching Cooking Methods, make sure to cover and assess poultry and fabrication.
Day 1:
Lecture (Food Composition, 3 types of Cooking Methods, 3 types of heat transfer, dry cooking methods) w/ notetaker.
* This is a mixture of my information and information from another PowerPoint that I found on the web.
*I have been unable to locate the other PowerPoint.
*But thank you so much, to the person that posted it 5 years ago. It has been such an awesome addition to my curriculum :)
Cooking Methods PowerPoint
Activity(give each of your students a cooking method and have them create a poster that explains the cooking method take these up and make copies for the entire class front and back)
Day 2:
Quiz Vocabulary
Quizlet Review: https://quizlet.com/_1z2umz (copy and paste)
Lecture:
Steps to Saute
- Preheat the pan.
- Add a small amount of fat (just enough to coat the bottom of the pan) and allow the heat to reach just under the smoke point.
- Add the dry food to the pan. *Do not overcrowd or the food will release liquid and simmer.
- Allow the food to caramelize on one side then turn to the other side.
- Adjust the temperature so that the food cooks thoroughly while browning the outside.
- Can Finish in the oven.
Lab: (Pan Seared Air Line Breast with a pan sauce) ALL OF YOUR STUDENTS NEED TO DO THIS http://www.foodnetwork.com/recipes/robert-irvine/pan-seared-chicken-breast-with-herb-jus-and-potato-vegetable-hash-recipe.html (don't make the hash)

Day 3: (1-3 days)
Lecture: Standard Breading Procedure/ Deep Frying methods
Food Truck Lab
Food Truck Lab
-1 day for planning
-1 day for presentation and peer judging of product and truck sales pitch/lab planning
-1 day for lab and judge presentation
-1 day for lab and judge presentation
Day 4:
Lab: Grilling Lab (St. Louis Style Ribs) see other blog post for more information.
Day 1: Rib Fabrication
Day 2:

Day 8: Lecture Moist Cooking Methods and Lab Same Day
Lab Pasta Primvera (FCCLA 2015-2016 Culinary Arts Recipe)

Day 9: Lecture Braising and Lab Same Day
I have four groups in my Hot Foods Class.
I buy a pork loin (20 dollars) from SAMS and cut it into 4 equal pieces.
I have the students trim the fat off of their cuts.
Then I let them season the pork loin how they would like (lets them express creativity and have choice).
Ingredients:
1/4 cup of oil
Quarter 8 oz of button mushrooms
Small Dice 1 Onion (yellow)
Mince 2 garlic cloves
Measure out 3 T AP Flour (for a roux)
3.25 cups of (no salt) chicken stock(If you as a teacher are doing this at home go for 1.5 cups white white 1.5 cups of unsalted chicken stock.)
Directions:
1. Trim Pork Loin
2. Season Pork Loin
3. Sear Pork Loin on all sides (about 7 min)
4. Remove Pork Loin and place in an oven safe baking dish.
5. In the same pan that you used to sear the pork add your button mushrooms, onion and garlic saute on medium heat until softened. ( about 6-7 min)
6. Add your flour and cook for 1 minute (this will help cook out the flour taste).
7. Then stir in stock a little at a time scraping the bottom to remove any brown bits stuck to the bottom of the pan (DEGLAZING)
8. Cook the sauce until thickened.
9. Poor the sauce over the pork loin and place in an oven pre-heated to 400 Degrees Fahrenheit.
10. Cook the pork until it reaches an internal temperature of 150 F and remove from the oven.
11. Remove the pork and allow to rest for 10 minutes.
12. Poor the sauce into a sauce pan and keep warm on the range.
13. After the pork has rested. Cut and serve with sauce.


Day 1: Rib Fabrication
Day 2:
- Lecture how to Start a Charcoal Grill and Season grates for a gas Grill
- Grill and BBQ Ribs

Day 8: Lecture Moist Cooking Methods and Lab Same Day
Lab Pasta Primvera (FCCLA 2015-2016 Culinary Arts Recipe)

Day 9: Lecture Braising and Lab Same Day
I have four groups in my Hot Foods Class.
I buy a pork loin (20 dollars) from SAMS and cut it into 4 equal pieces.
I have the students trim the fat off of their cuts.
Then I let them season the pork loin how they would like (lets them express creativity and have choice).
Ingredients:
1/4 cup of oil
Quarter 8 oz of button mushrooms
Small Dice 1 Onion (yellow)
Mince 2 garlic cloves
Measure out 3 T AP Flour (for a roux)
3.25 cups of (no salt) chicken stock(If you as a teacher are doing this at home go for 1.5 cups white white 1.5 cups of unsalted chicken stock.)
Directions:
1. Trim Pork Loin
2. Season Pork Loin
3. Sear Pork Loin on all sides (about 7 min)
4. Remove Pork Loin and place in an oven safe baking dish.
5. In the same pan that you used to sear the pork add your button mushrooms, onion and garlic saute on medium heat until softened. ( about 6-7 min)
6. Add your flour and cook for 1 minute (this will help cook out the flour taste).
7. Then stir in stock a little at a time scraping the bottom to remove any brown bits stuck to the bottom of the pan (DEGLAZING)
8. Cook the sauce until thickened.
9. Poor the sauce over the pork loin and place in an oven pre-heated to 400 Degrees Fahrenheit.
10. Cook the pork until it reaches an internal temperature of 150 F and remove from the oven.
11. Remove the pork and allow to rest for 10 minutes.
12. Poor the sauce into a sauce pan and keep warm on the range.
13. After the pork has rested. Cut and serve with sauce.


Pork Medium Rare 145 F
Medium 150 F
Well Done 160 F
Comments
Post a Comment